Make your own Chili Sauce
Make your own Chili Sauce
Basic recipe for making your own chilli sauce
You can easily make your own delicious chilli sauce from just a few ingredients. Especially in autumn, all the chillies are usually ripe at the same time and you are looking for methods to preserve the many beautiful pods. Besides drying, freezing and pickling, making your own sauce is the ideal complement. Imagine giving your own chilli sauce as a gift for Christmas.
Basic recipe for a chilli sauce (ingredients can be changed according to availability and taste)
300 g Brazilian Starfish + bell peppers
300 ml water
1 Palatinate Nashi pear (originally from Japan and very juicy and aromatic)
30 ml lemon juice
30 ml apple vinegar
Salt according to taste
Preparation
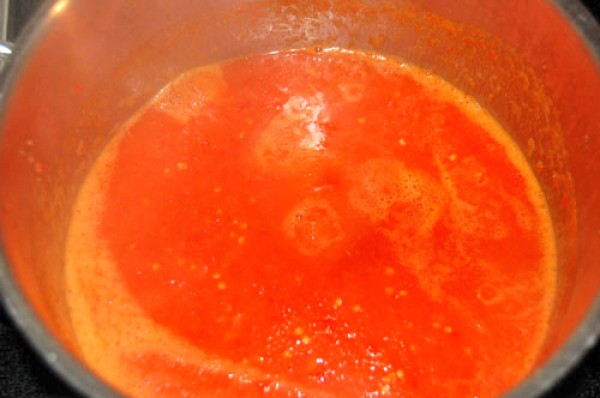
Wash the chillies thoroughly and remove the stalk. Peel the Nashi pear and cut into small pieces. Put the chillies and the nashi pears in a large pot with the lemon juice, cider vinegar and water. Bring to a gentle simmer until all the ingredients are soft, then puree. Bring to the boil again briefly and immediately fill into sterilised jars or bottles. You can also sterilise the jars in the oven at 220 degrees for 15 minutes. Our recipe yielded about 700 ml of sauce. The heat level is about 7, absolutely perfect.
Consistency of the sauce: If you want the sauce to be thicker, simply increase the amount of chillies. If you want it to be thinner, increase the amount of water.
Preservation: You can preserve the sauce by filling it while it is boiling hot. Alternatively, fill in cold and boil down for 1 hour in a preserving pot. The water should bubble slightly. The boiling down time starts as soon as the water boils.
Manufacturer
Name: | Chili-Food-Wissen |
Address: |
Geht in allen Varianten
Seit Jahren verarbeite ich auf ähnliche Art fast die gesamten Chiliernte. Allerdings nicht als Soße, sondern als Paste zum Dippen und Aufstreichen. Der Rest wird im Stück eingefrostet.
Als erstes ziehe ich mir ein paar Latexhandschuhe über :-)
Dann werden die Chilies gewaschen, vom Stiel befreit und grob zerkleinert.
Eine gute Portion Olivenöl kommt in den Topf, die zerkleinerten Chilies dazu.
Nach Lust und Laune jetzt noch alles, was so greifbar ist:
- Mango, Apfel, Orange - am Stück oder als Saft
- Gemüsepaprika, Tomaten, Tomatenmark
- Limettensaft, Salz
Das lässt man unter Rühren eine Weile blubbern bis alles schön heiss ist. Wasserzugabe ist eigentlich nicht nötig. Je nach Chiliesorte drüften jetzt die Augen anfagen zu tränen :-)
Abschmecken funktioniert nicht so richtig, darum einfach vom Instinkt leiten lassen. Das Ergebnis ist dann auch jedes Jahr anders.
Jetzt ist die Zeit für den Stabmixer. Der häckselt die Früchte im Topf kurz und klein. Je nach Gusto kann man die Stücken etwas gröber lassen oder man macht einen richtgen Brei draus. Der Topf bleibt dabei auf dem Herd!
Durch das wenige Wasser im Topf macht es jetzt immer wieder kräftig "Blubb", die Paste möchte sich gerne in der Küche verteilen. Passt auf eure Augen auf! Eine Schutzbrille sieht zwar albern aus, erspart aber schmerzhafte Stunden!
Die Paste wird nun so heiss wie möglich in sterilisierte Gläser gefüllt. Ist eine ziemliche Saurei, darum reichlich Küchenrolle vorher bereitlegen.
Da die Paste in geöffnetem Zustand innerhalb 2 bis 3 Wochen verderben kann, nehme ich immer möglichst kleine Gläser, die schnell aufgebraucht sind.
Mahlzeit!
leicht nachkochbar
Ich nehme statt der Nashi Birne reife, rote Gemüsepaprika, da wird die Soße kräftig rot mit nem leicht süßem Aroma.


